
Table of Contents
Introduction
Yellowstone National Park is one of the most popular parks in the U.S., and it’s easy to understand why: It’s home to more than 20 geysers, including Old Faithful and Grand Prismatic Spring; more than 1,000 waterfalls; and abundant wildlife—including bison, wolves, and bears. The park offers many different photographic opportunities, but since Yellowstone is so large (it spans 3,500 square miles), it can be difficult to know where to start. Here are some tips for photographing at Yellowstone National Park…
Do a lot of research beforehand.
- Research the park’s wildlife and geology.
- Research the park’s history.
- Research the park’s regulations.
- Research the park’s weather.
- Research the park’s safety.
- Learn about its location—the best time to visit, what it’s like during different seasons, etc.—and plan an itinerary based on this research so that you can make sure not to miss anything important!

Get familiar with the park’s layout.
Before you start your trip, make sure you are familiar with the layout of Yellowstone National Park. This will be helpful in planning which parts of the park to visit and where to stay.
The map below shows how Yellowstone is laid out:
- The north entrance (west) side is divided into three regions: Mammoth Hot Springs, Tower-Roosevelt and Canyon districts. Each district has its own visitor center and campground area.
- The south entrance (east) side is divided into two regions: Old Faithful area and Fishing Bridge area. These two areas are connected by a road that goes through Madison Junction near Tower-Roosevelt Monument Visitor Center and Natural Bridge Ranger Station on Grand Loop Road in Canyon District, but there are also roads that go around these areas as well; so it’s not necessary to go through them if you don’t want too!

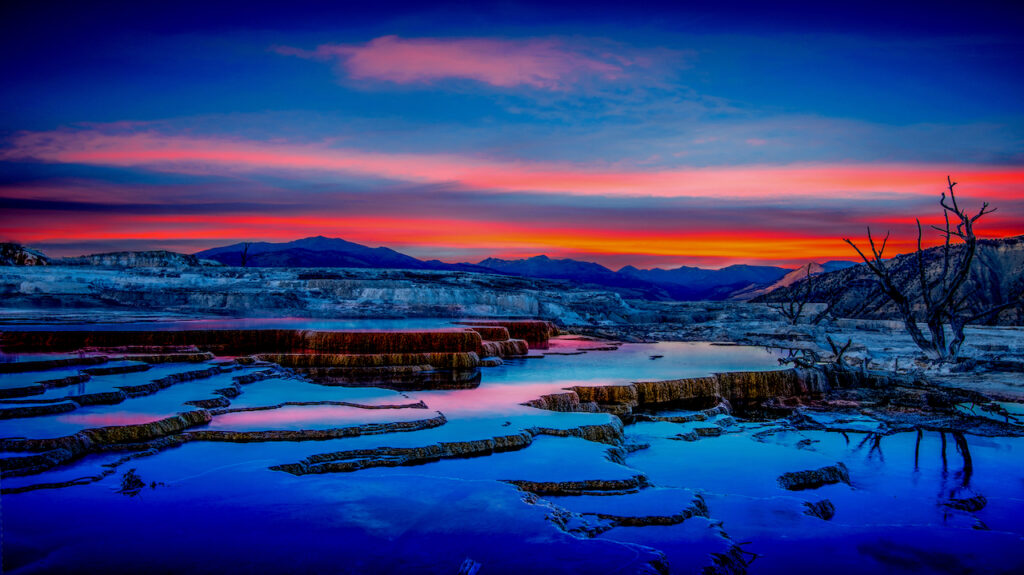
Pick your season.
Your choice of season will depend on what you want to photograph, but generally speaking, the best time to visit Yellowstone is during the summer months.
The park is busiest between June and August, which means that it’s best to visit before or after this period if you’re looking for fewer crowds. The park is closed from November to April due to snow accumulation in certain areas. The winter months pose another challenge: temperatures can drop below zero degrees Fahrenheit (0°F) and there are no services available after October 26th until May 1st.

Arrive early, stay late.
You’re going to want to arrive at Yellowstone National Park as early in the day as possible. That way, you can spend a lot of time exploring and photographing everything that catches your eye—and still have time to eat lunch and leave before it gets dark.
So when should you leave? That depends on what type of experience you want. If you’d prefer more daylight hours so you can capture beautiful landscapes and animals, then plan on leaving earlier in the day. If staying out late sounds fun to you (and we know it does!), then plan on staying later in the evening. Either way, make sure that wherever you’re visiting has comfortable lodging available; it’s better to be able to afford an extra night than not have enough energy after getting home from an exhausting day!
Some other tips: bring snacks (and water!), wear appropriate shoes for hiking trails and weather conditions, take enough batteries for all devices or bring chargers along with them (power outlets aren’t always available), pack extra memory cards for every camera owner who doesn’t have unlimited storage space…
Use a long lens to pull in the details.
A long lens will help you get the background out of focus so that it doesn’t take away from your subject. When you’re photographing wildlife, for example, a long lens will allow you to capture their faces up close while still getting them in their natural environment. If you can swing a 400mm f/2.8 that with a 2.0x, but if you have a 200mm you can manage with a 2.0x.
If you’re planning on photographing at Yellowstone National Park, we recommend taking a tripod. It’s no use trying to capture the beauty of the park unless you have a steady hand, and when it comes to capturing nature, there’s nothing better than a tripod.

Capture wildlife moments.
- Photograph animals at rest.
- Photograph animals in motion.
- Photograph animals interacting with each other.
You can do this by observing the behavior of a particular animal or group of animals, then waiting for them to interact (for example, wolves or bears eating).
There are several ways you can photograph wildlife: from ground level or from higher vantage points such as trees and rocks.

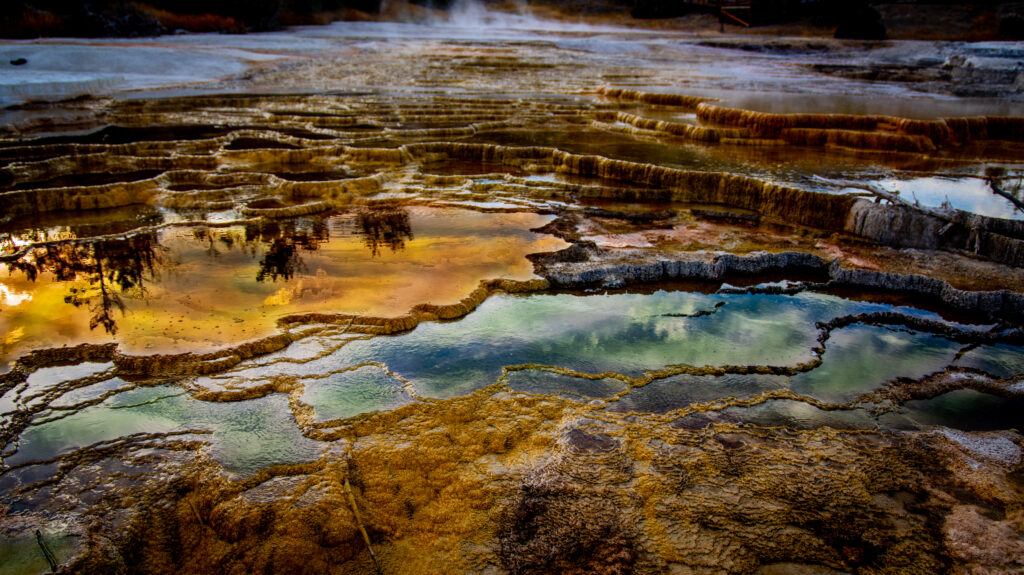
Get up close and personal with the geysers.
- Use a long lens to get close to the geysers. If you’re looking to capture images of Yellowstone’s geysers, then you’ll want to use a long zoom lens or telephoto lens. A wide-angle lens will also work, but it might be too much—you can’t really see the spray or steam from the geyser if you’re too far away. If possible, try getting as close as possible without causing any issues with other visitors who are also trying to experience these natural wonders.
- Use a tripod for stability when shooting slow shutter speeds and/or in low light situations where camera shake is likely. A good rule of thumb is if your shutter speed is longer than 1/30th of a second (thirty milliseconds), then it’s best to use a tripod or some sort of accessory that will allow for steady shots even when using slower settings on your dSLR camera body itself; otherwise, blurry photos could result from not having proper support for your gear during long exposures!
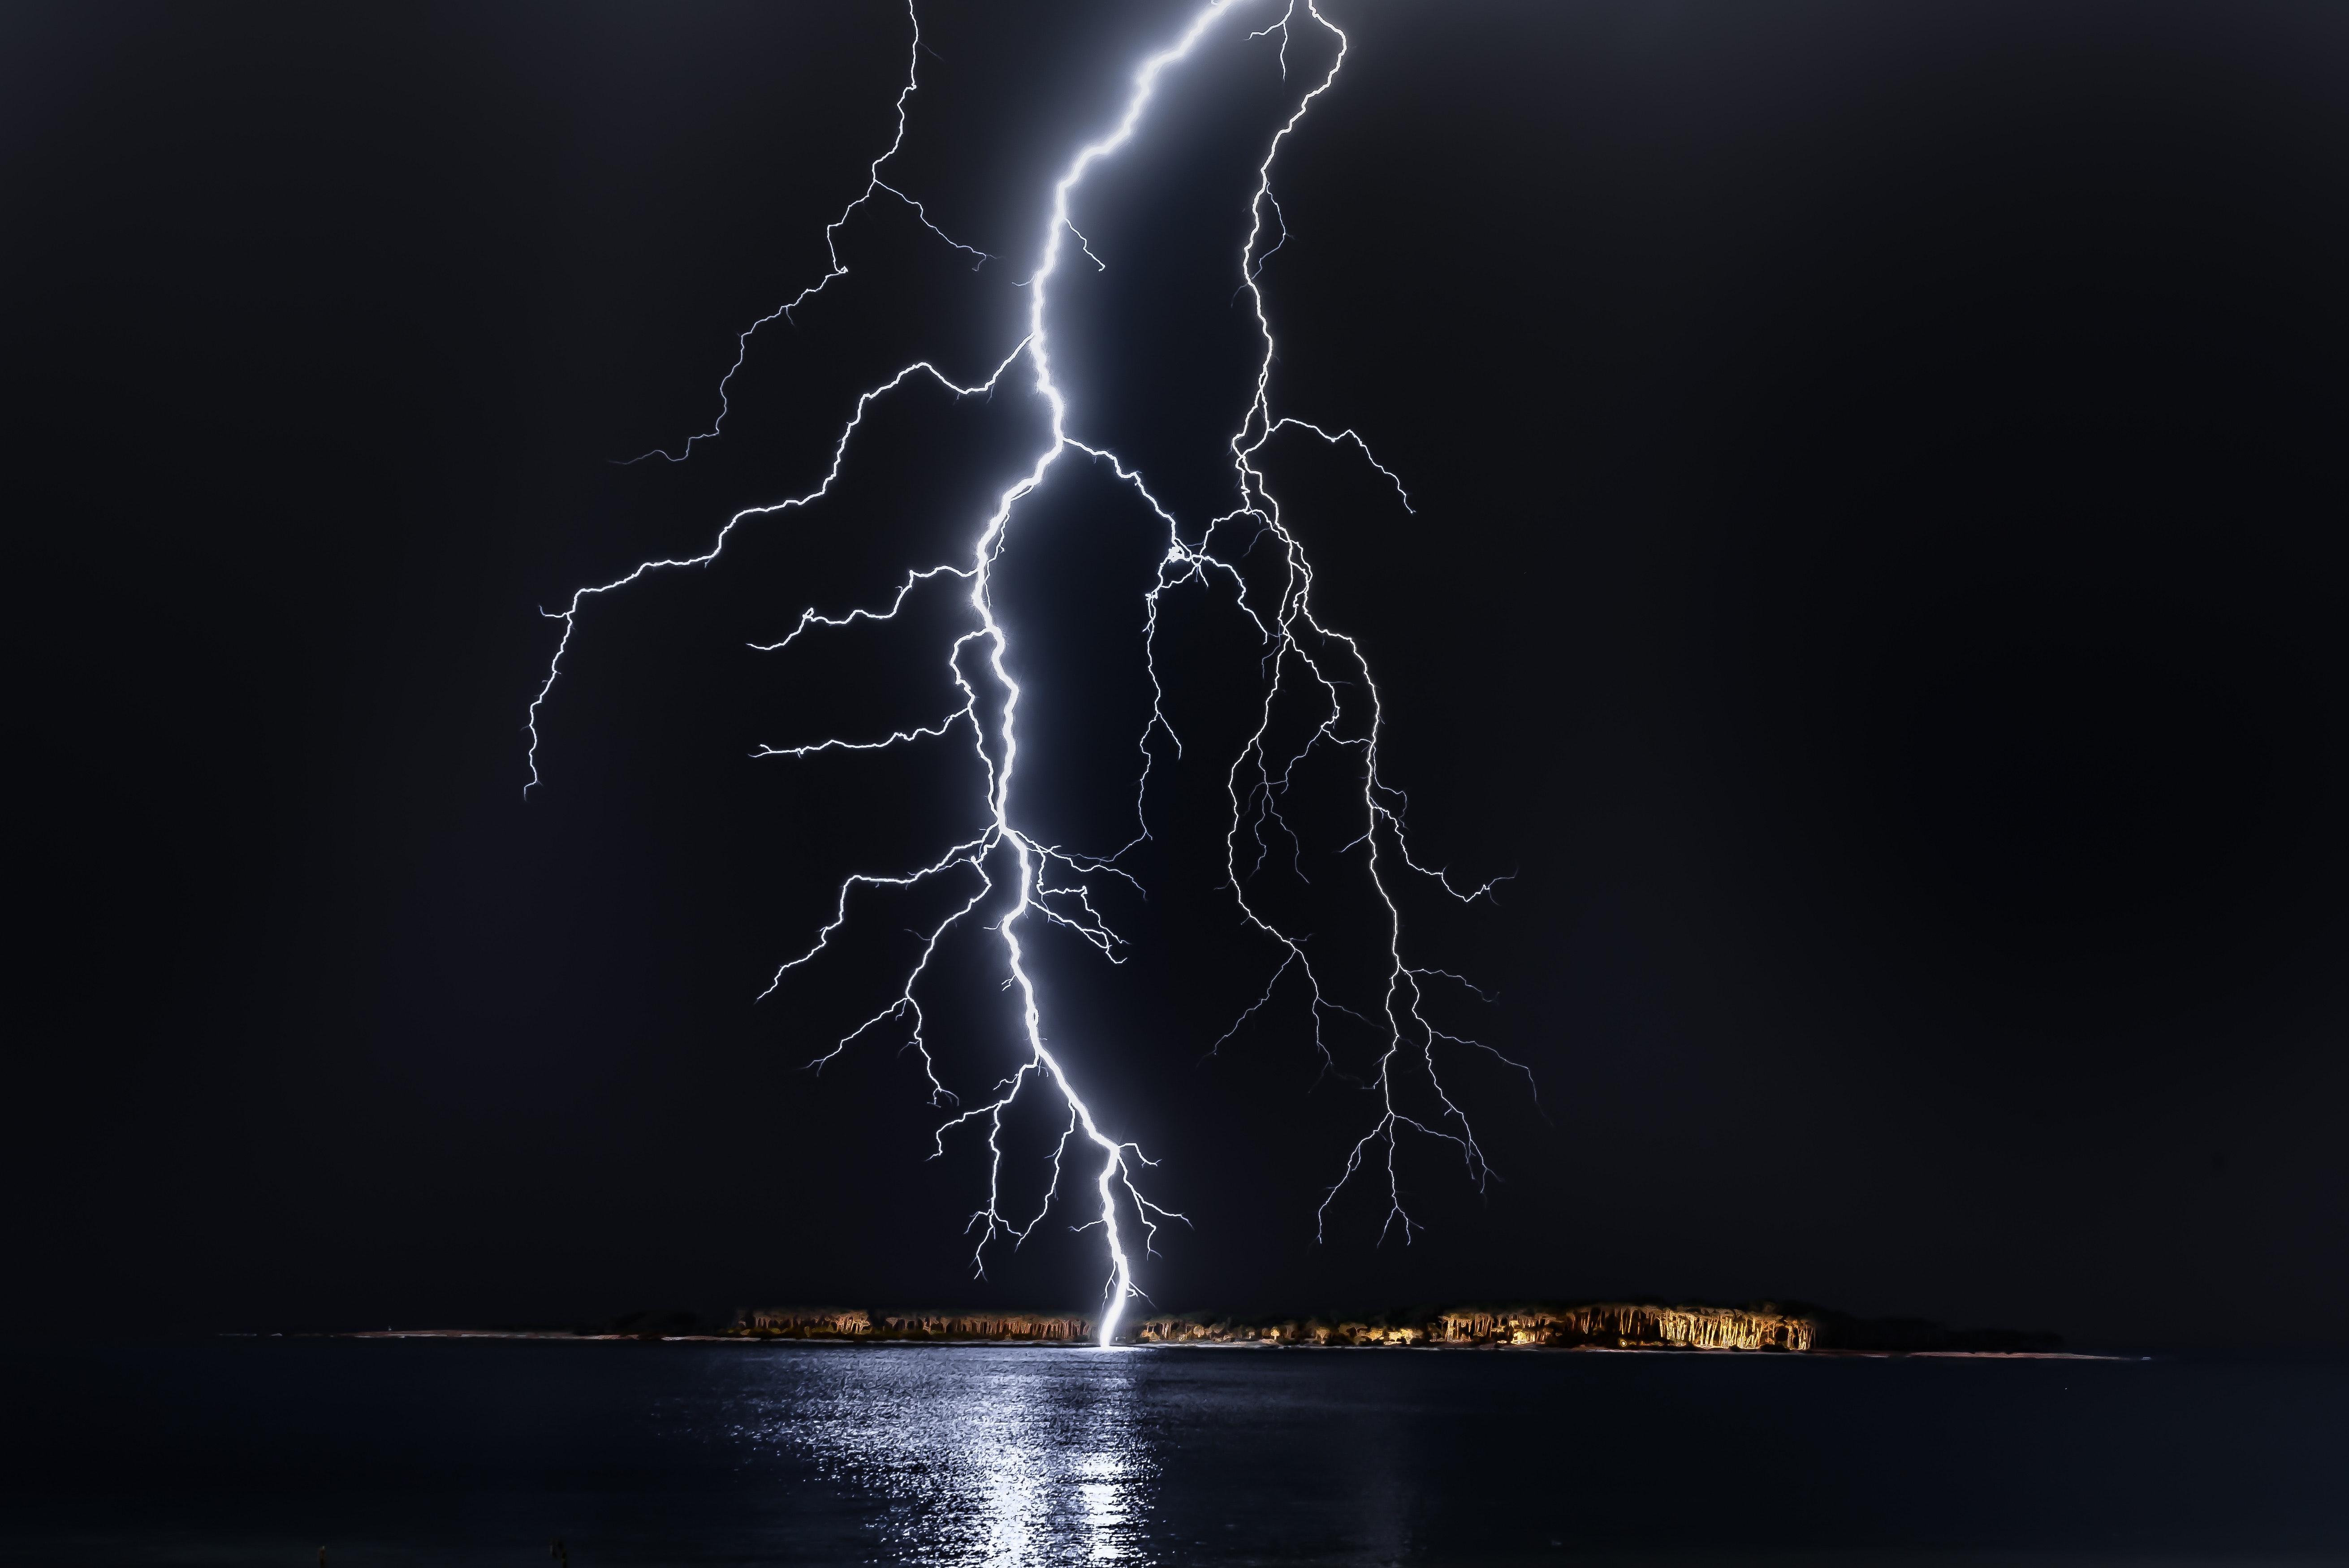
Have fun shooting at night, too.
Nighttime is a great time to shoot, too. You can use a tripod to get sharper images and use a flash to light up your subject (if you have one). Keep an eye out for interesting compositions and don’t be afraid to experiment with different angles and focal lengths. When shooting at night, it’s also important to remember that the shutter speed gets longer, so if your camera has image stabilization features turned on (like my Nikon Z9), turn them off so you don’t accidentally smooth out images with blurry details. If you want more control over your final image quality when shooting in low-light situations like this, consider shooting in RAW format; I always do!
The key to a successful trip is advance preparation and research on where to go, what to bring and how to get there.
As the oldest national park in the United States, Yellowstone is one of the most popular destinations for photographers. With over 2 million visitors each year, it can be easy to get lost in the crowd—but with a few tips and tricks, you can ensure that your trip to Yellowstone National Park is a success.
- Research: Researching before going to Yellowstone is crucial because it will help you plan out your days and maximize your time there. Looking at maps of different areas will give you an idea about what locations might work best for photographing wildlife or scenic views. Study up on which animals are active during different seasons so you know where they’ll be when it’s time to go.
- Bring gear: You don’t want to show up at Yellowstone without any equipment (or worse yet—without batteries!). Make sure that any equipment or accessories you need are fully charged before leaving home so they’ll last throughout your journey; otherwise, pick up some extra battery packs along the way if necessary!

Conclusion
Hopefully, we’ve given you some helpful tips to make your next trip to Yellowstone National Park a success. Remember: the key is advance preparation and research on where to go, what to bring and how to get there. And don’t forget that the park’s beauty isn’t just limited by its boundaries; it’s also in other areas like nearby Grand Teton National Park or even nearby towns like Jackson Hole!


Be the first to comment